Posts tagged painting

Painting the T’au Devilfish: A Step-by-Step Breakdown

Preparing for the Project

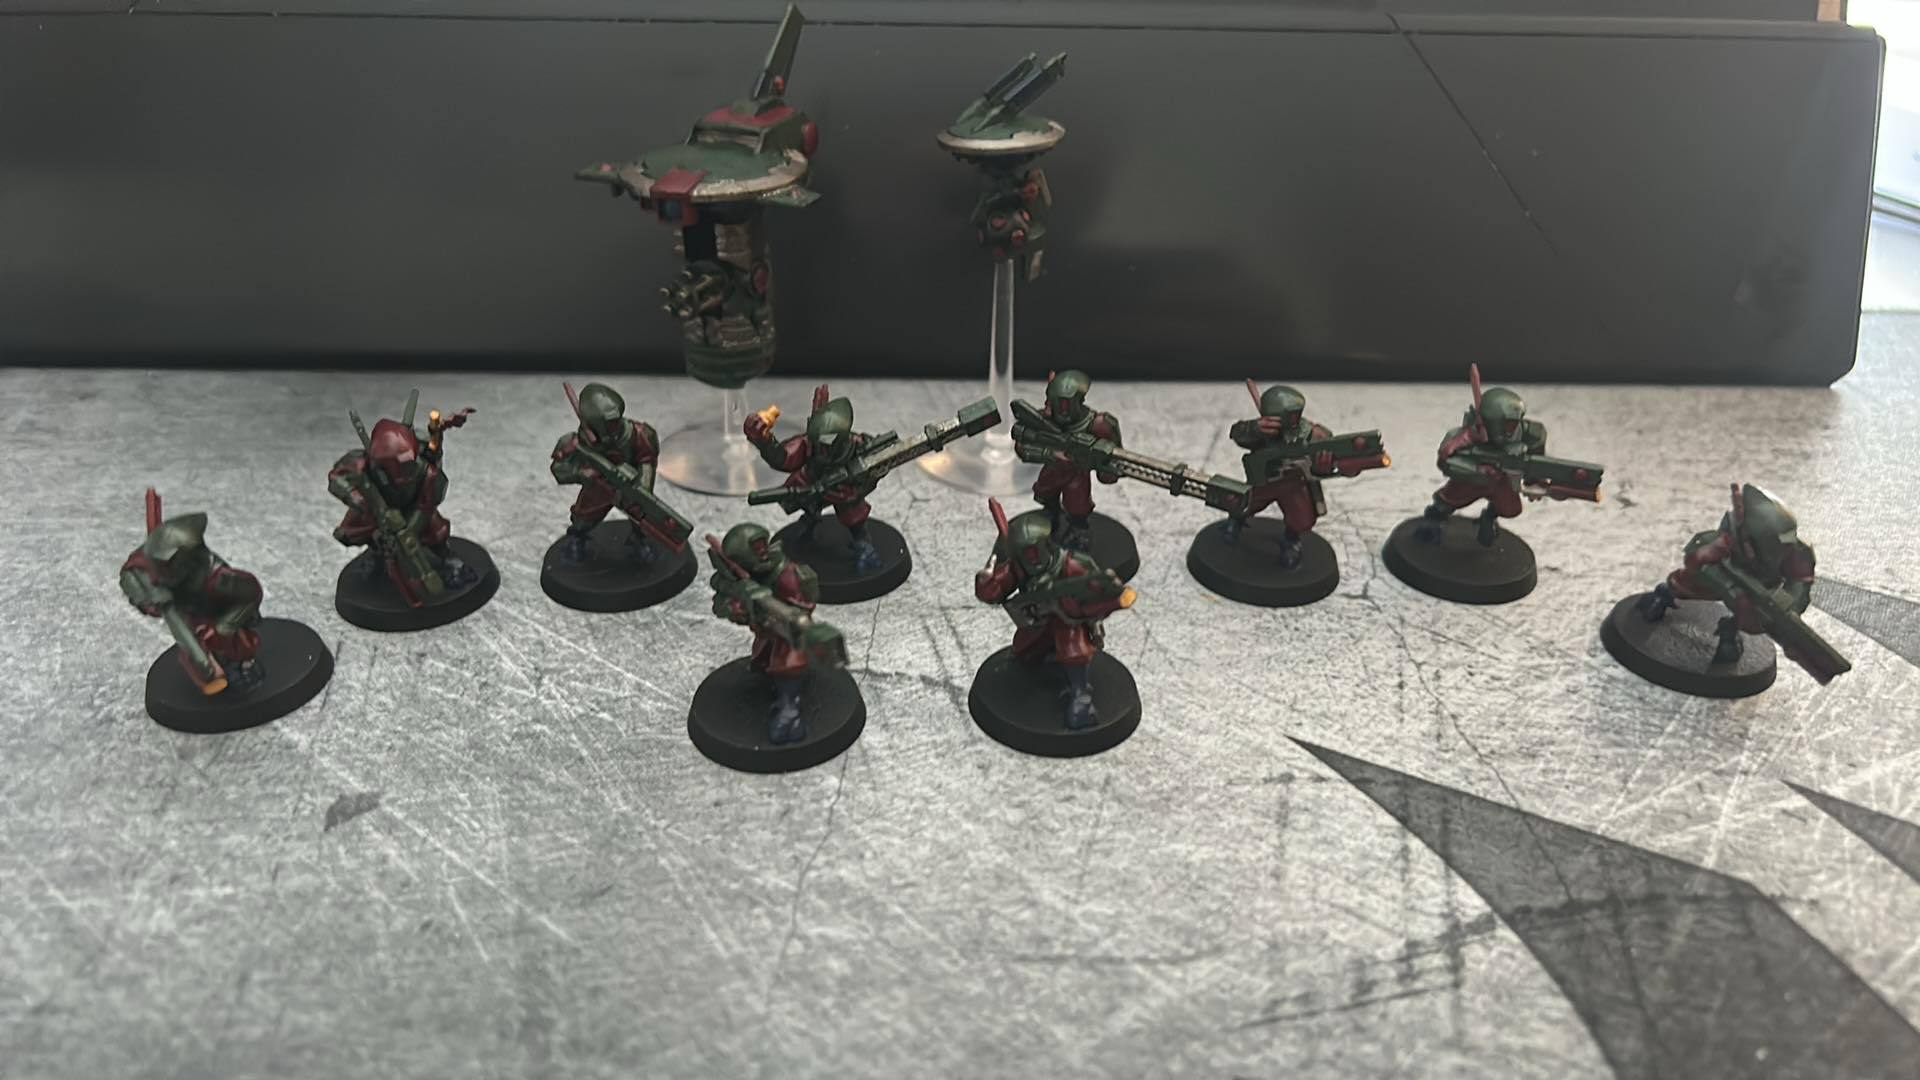
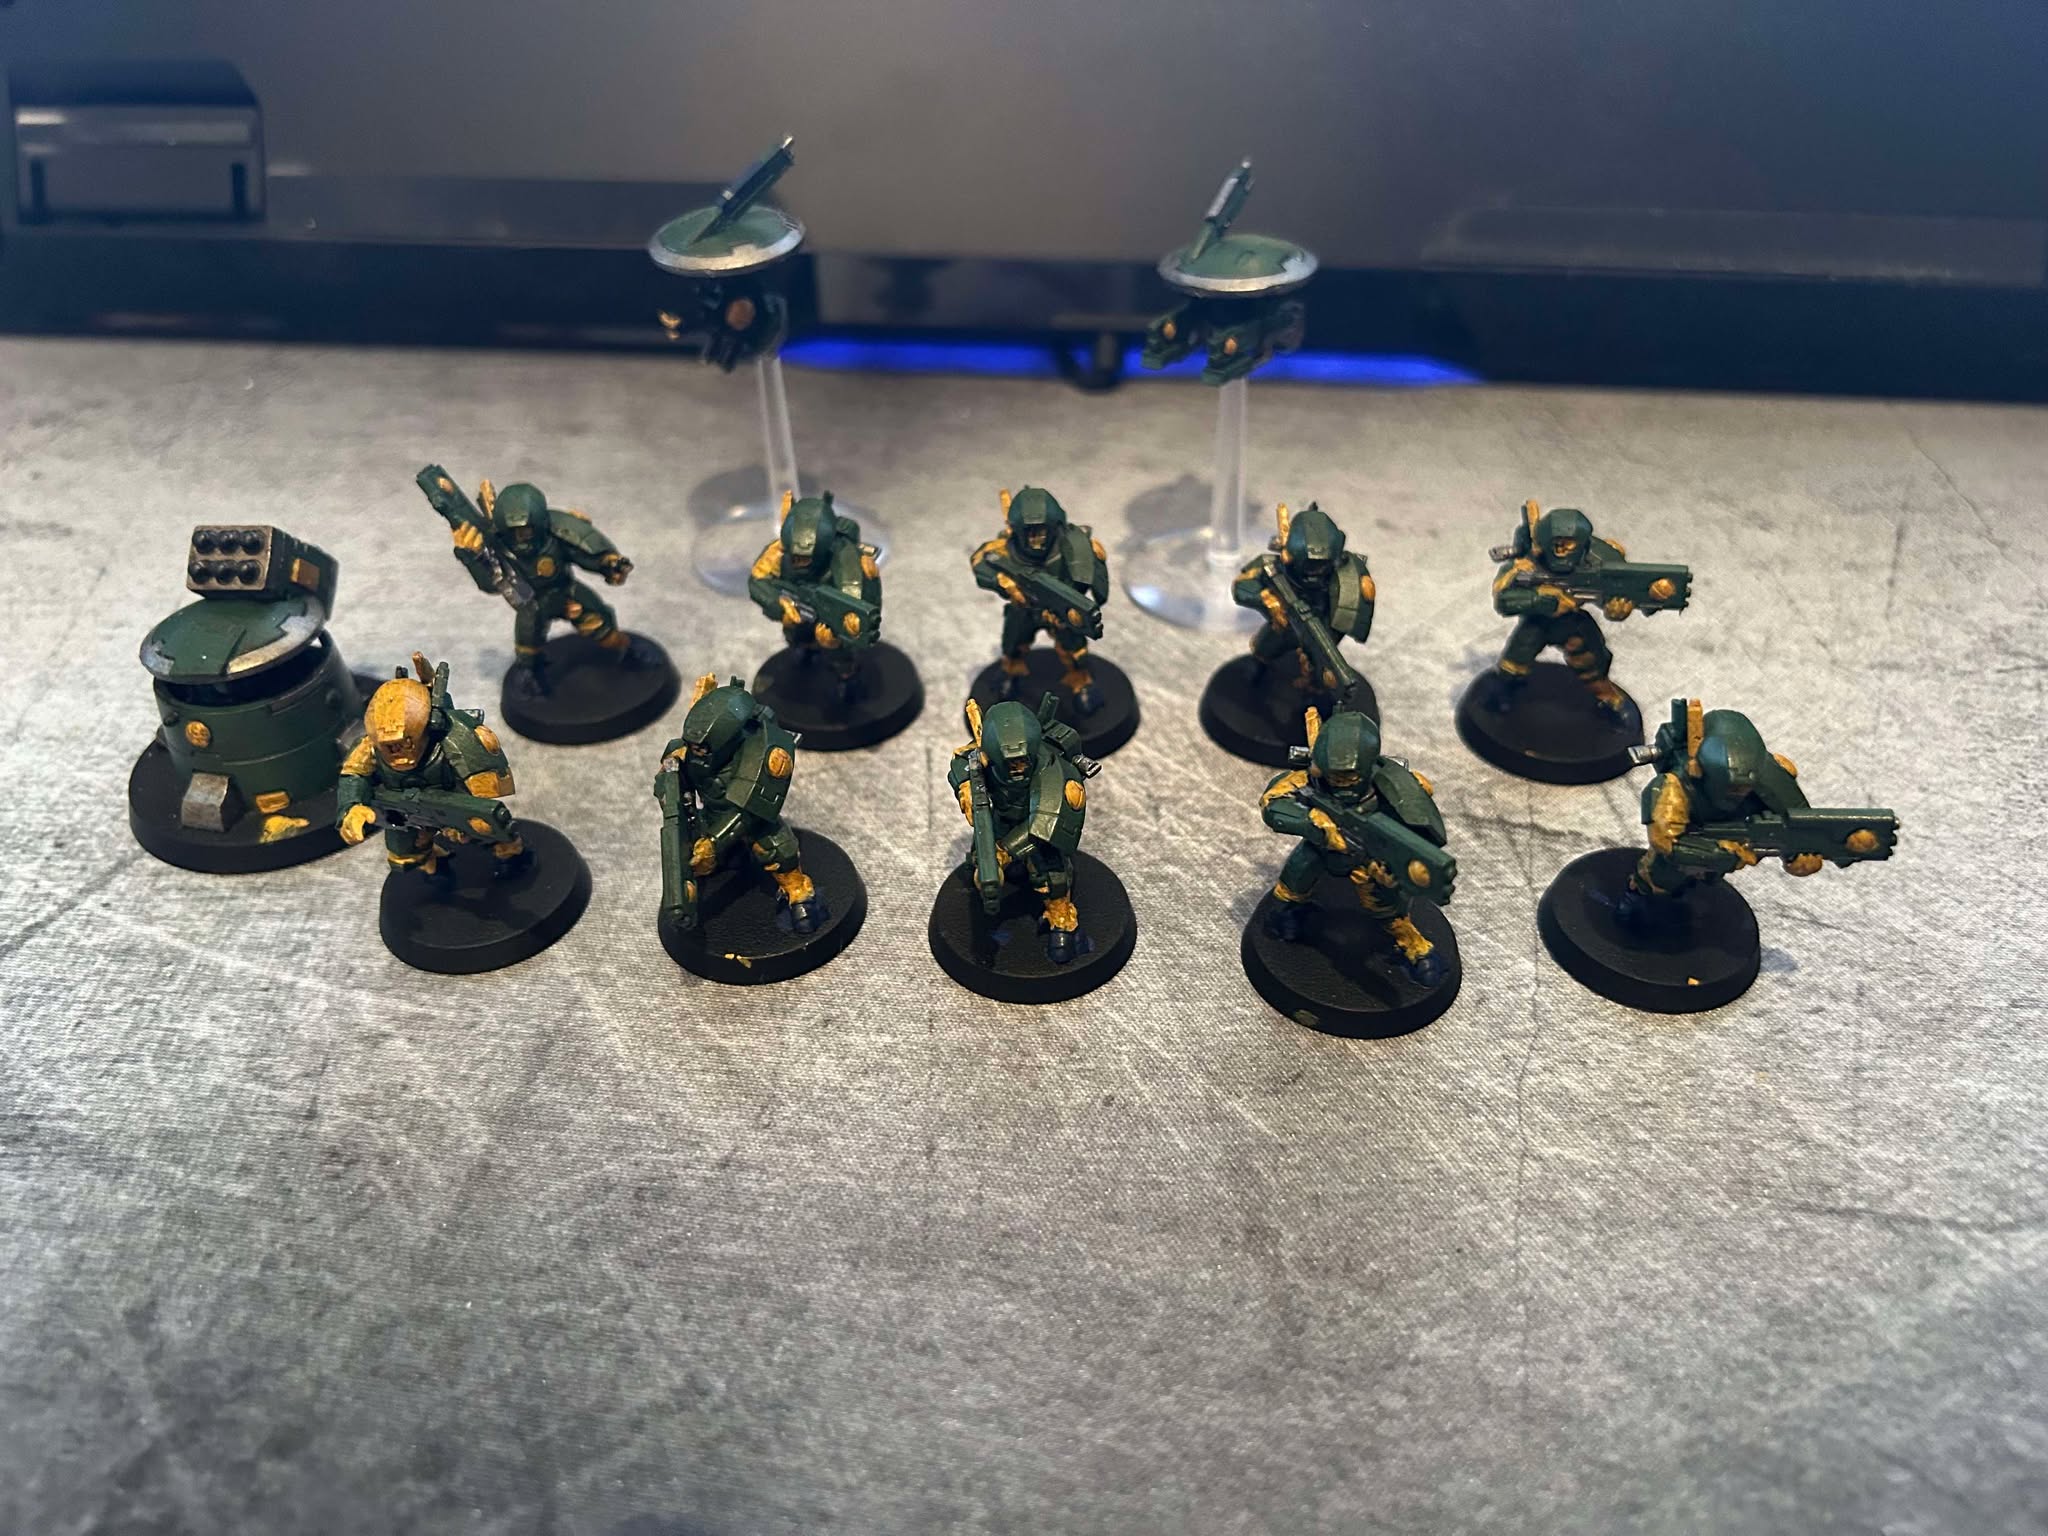
The next phase of my painting journey brings me to the T’au Devilfish, my first vehicle. With this done, only the commander remains to complete the combat patrol. I’m debating whether to finish him now or shift focus to my next army, especially since I’ve picked up the Thousand Sons combat patrol as well. Plenty of options to consider.

Time Investment

One challenge I hadn’t anticipated was just how time-consuming painting a vehicle would be. Between the main body, two engines, and two gun drones, I spent over 10/15 hours, without even adding highlights to the hard edges and finer details. At this stage, I don’t feel ready to tackle that level of precision, but experienced painters would have spent even longer refining every surface. I look forward to reaching that skill level.

Testing the Colour Scheme

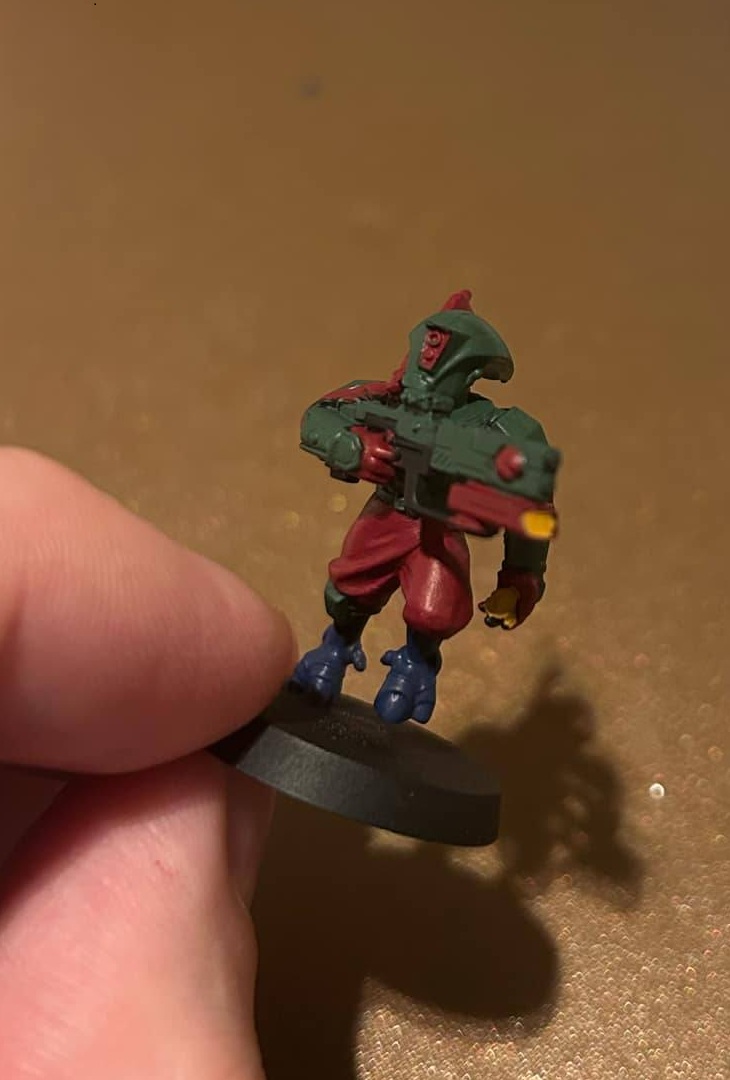
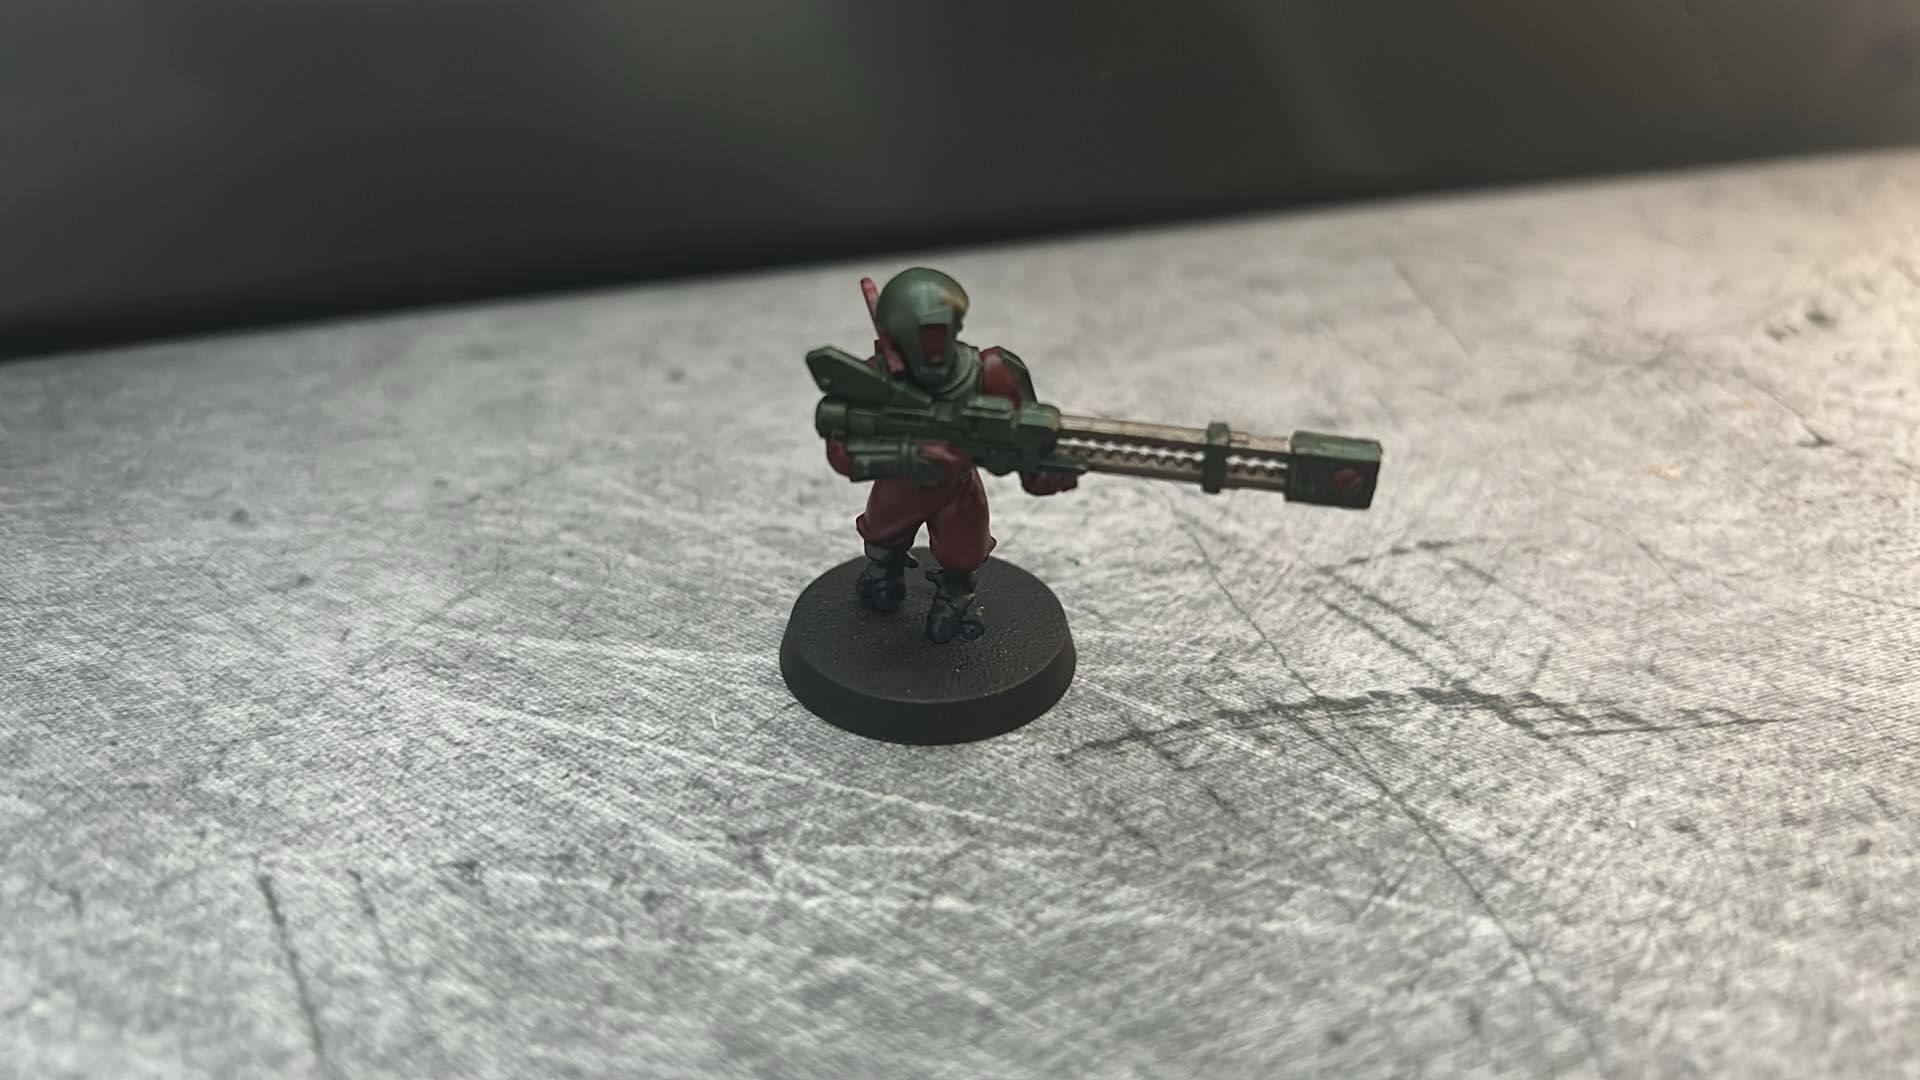
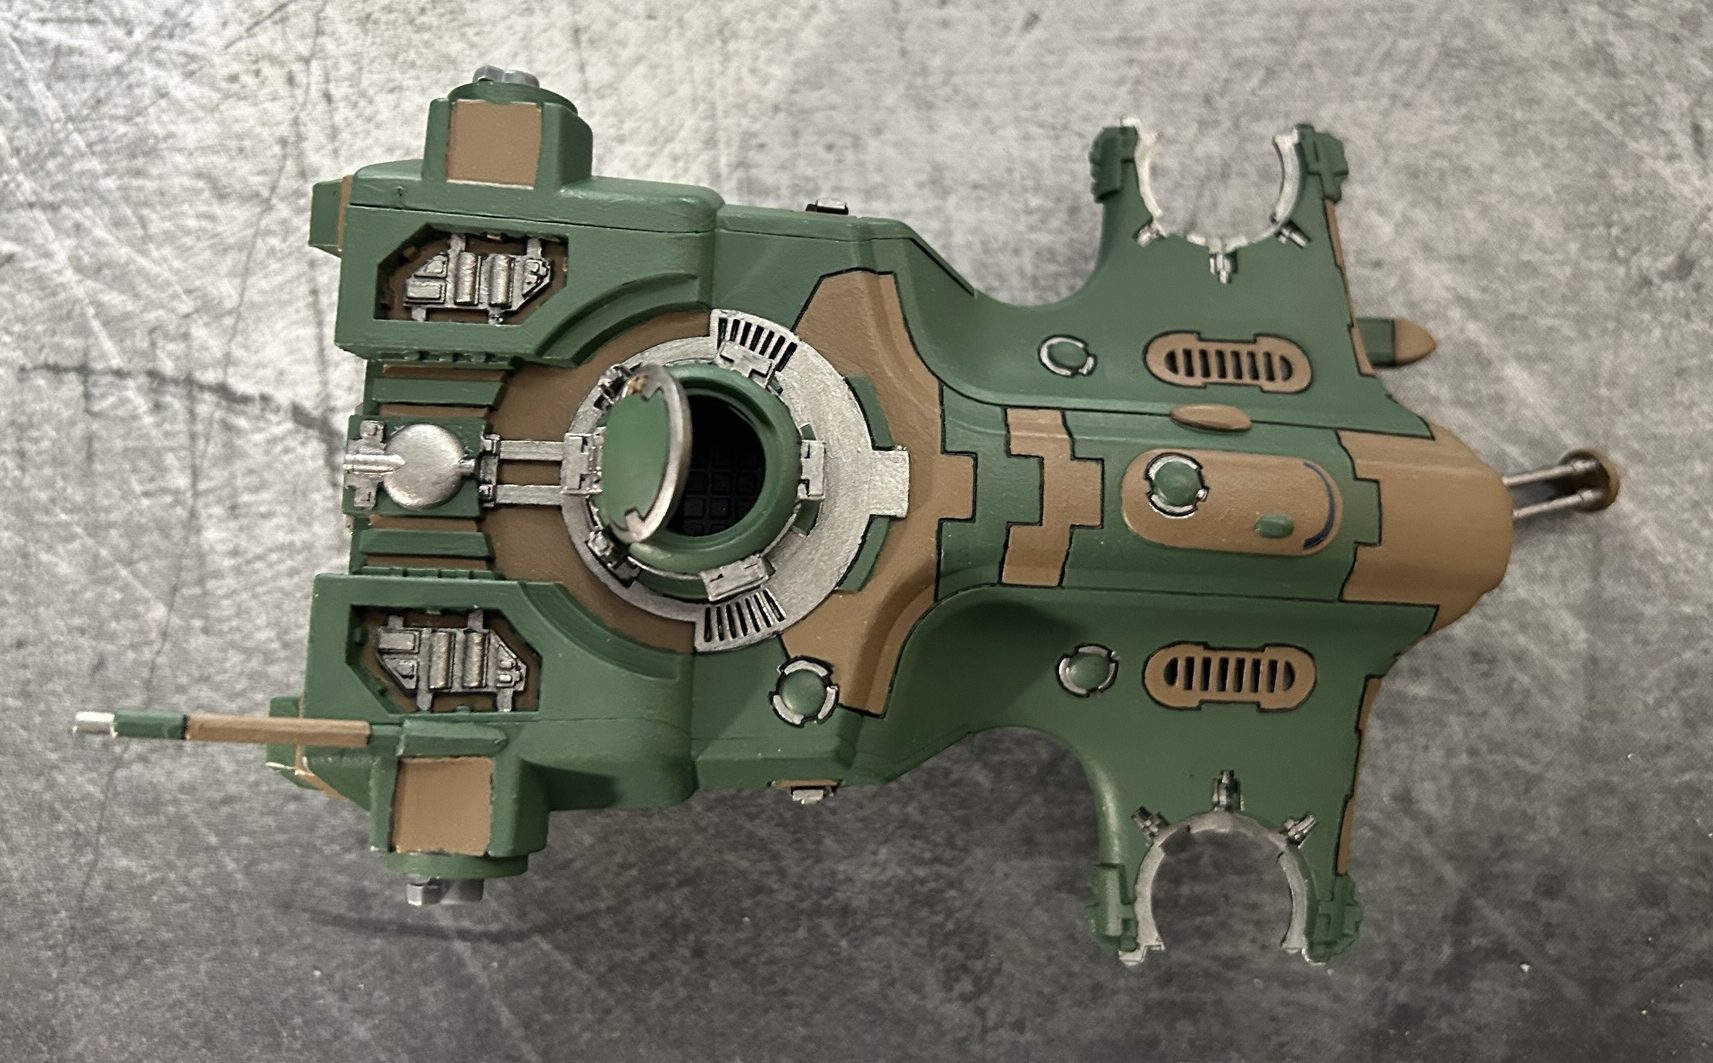
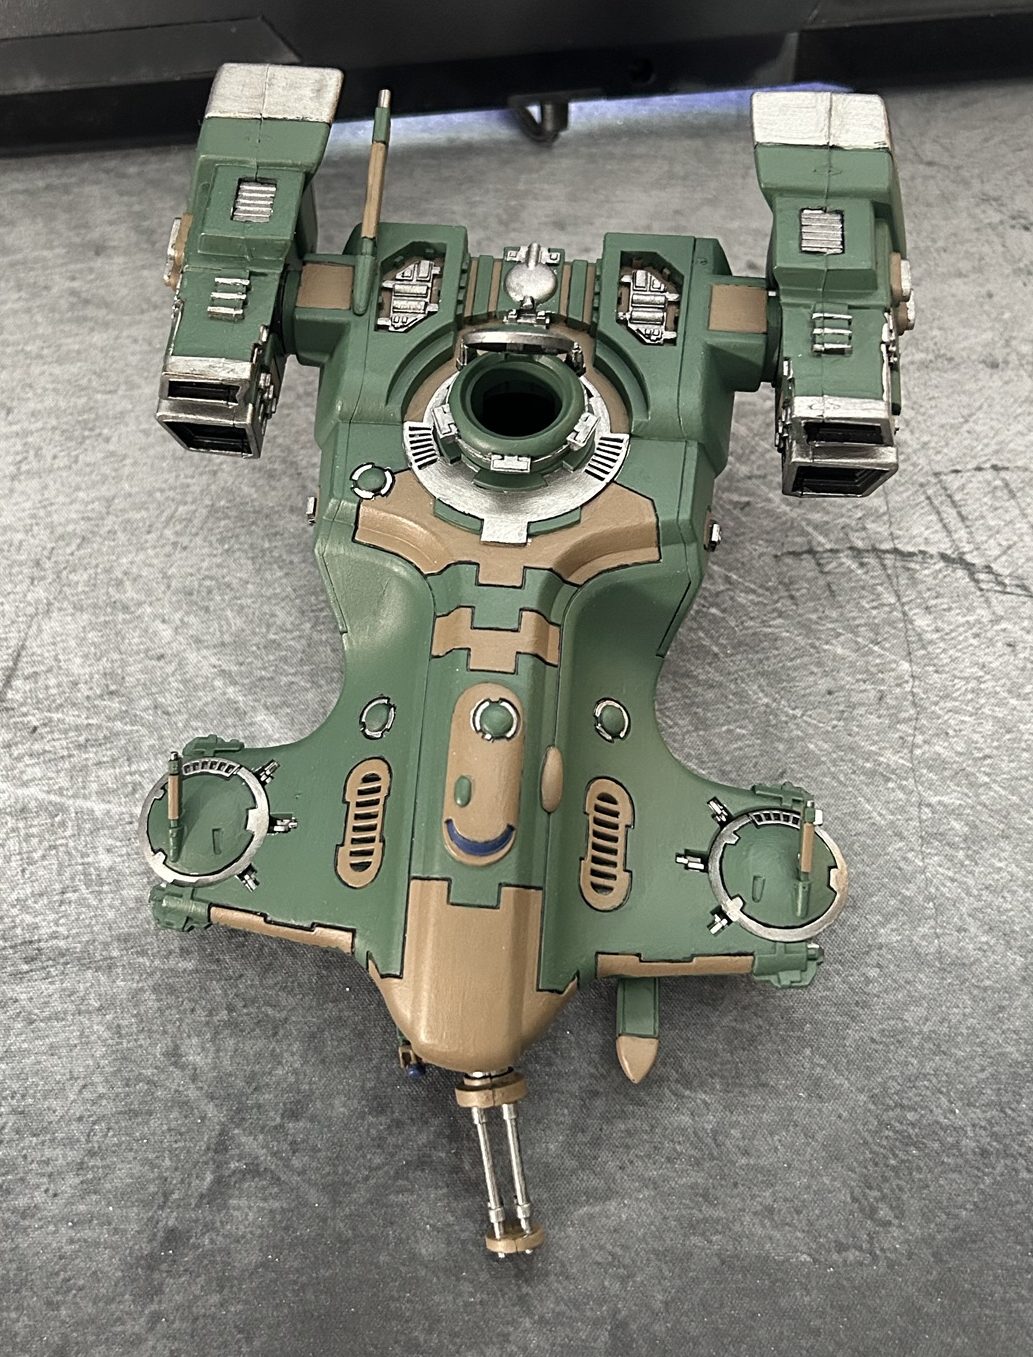
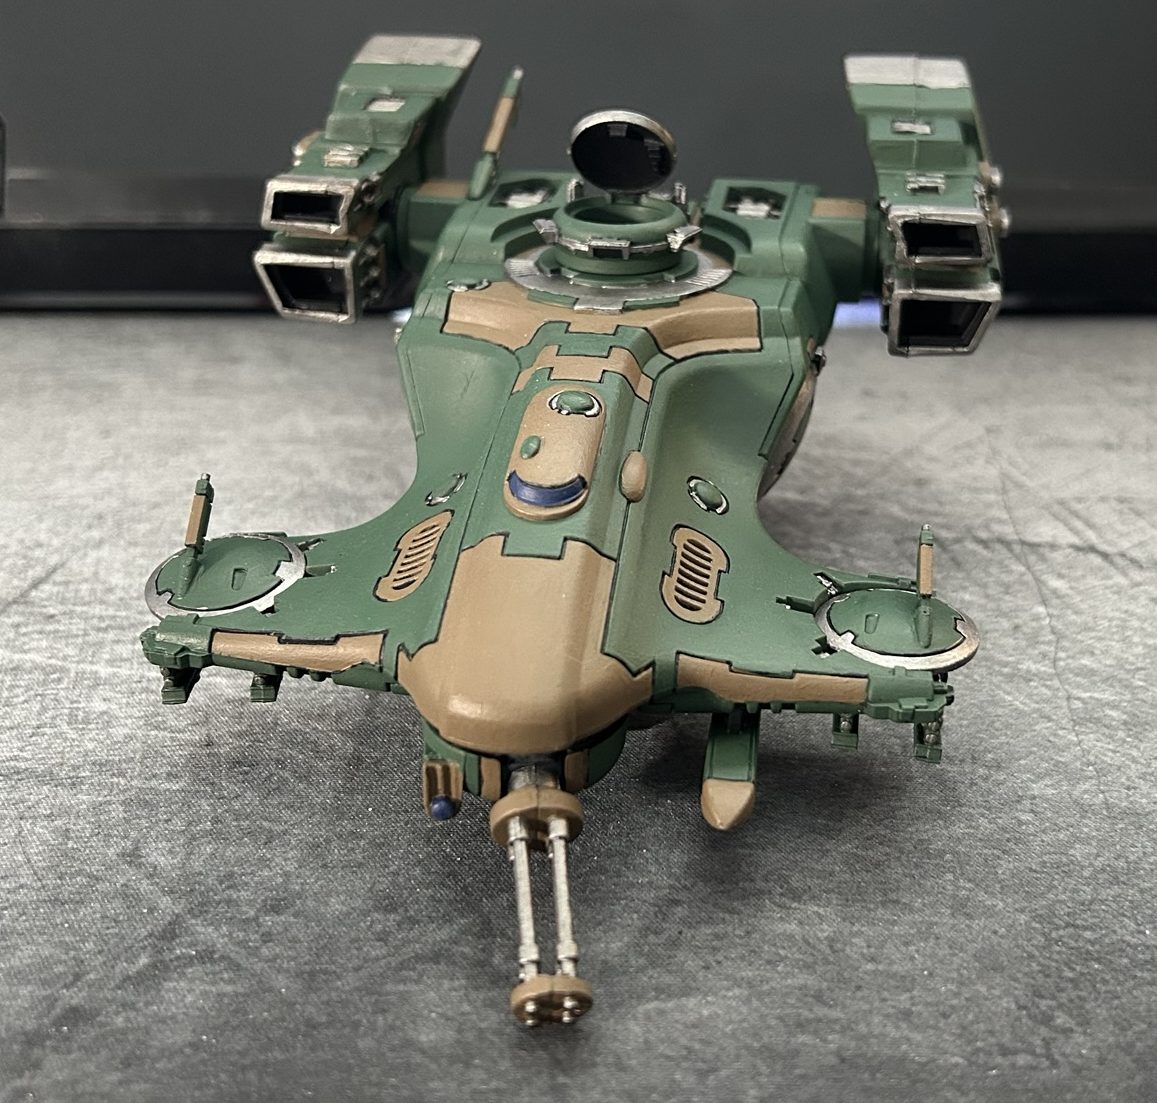
For this model, I chose brown as the secondary color to complement the green, with silver for the metal sections. The result? A surprisingly Boba Fett-inspired aesthetic, which turned out better than expected.

To test the color scheme, I painted one of the detachable engines first instead of starting with the main body. That way, if the scheme didn’t work, adjusting it would be much easier. Fortunately, planning out the sections didn’t take long, and I didn’t need to swap the green and brown, saving me time.

Painting the Engines

I started with the brown, since those areas were smaller, carefully picking out panels one at a time. The engines weren’t too troublesome to keep clean, tackling one side at a time. Two layers provided solid coverage over the undercoat, and the result was already looking sharp.

Moving onto the green, the larger surfaces made it difficult to judge how much paint to dilute and how quickly sections would dry. At first, I wasted a little paint as it dried faster than I could use it, but I started mixing smaller amounts each time, eventually overcompensating. Knowing how much paint to mix at once was a challenge throughout the Devilfish project, but it’s just one of many lessons to learn. Fortunately, the green sections didn’t cause too many issues with difficult details.

The silver areas, however, presented some challenges, particularly the small pipes at the front of the engines. I had to correct some green sections where visible brush strokes had overlapped onto smaller areas. Once I cleaned it up, I was really happy with the final look, so I decided to continue using this colour scheme for the rest of the model.

Painting the Main Body:

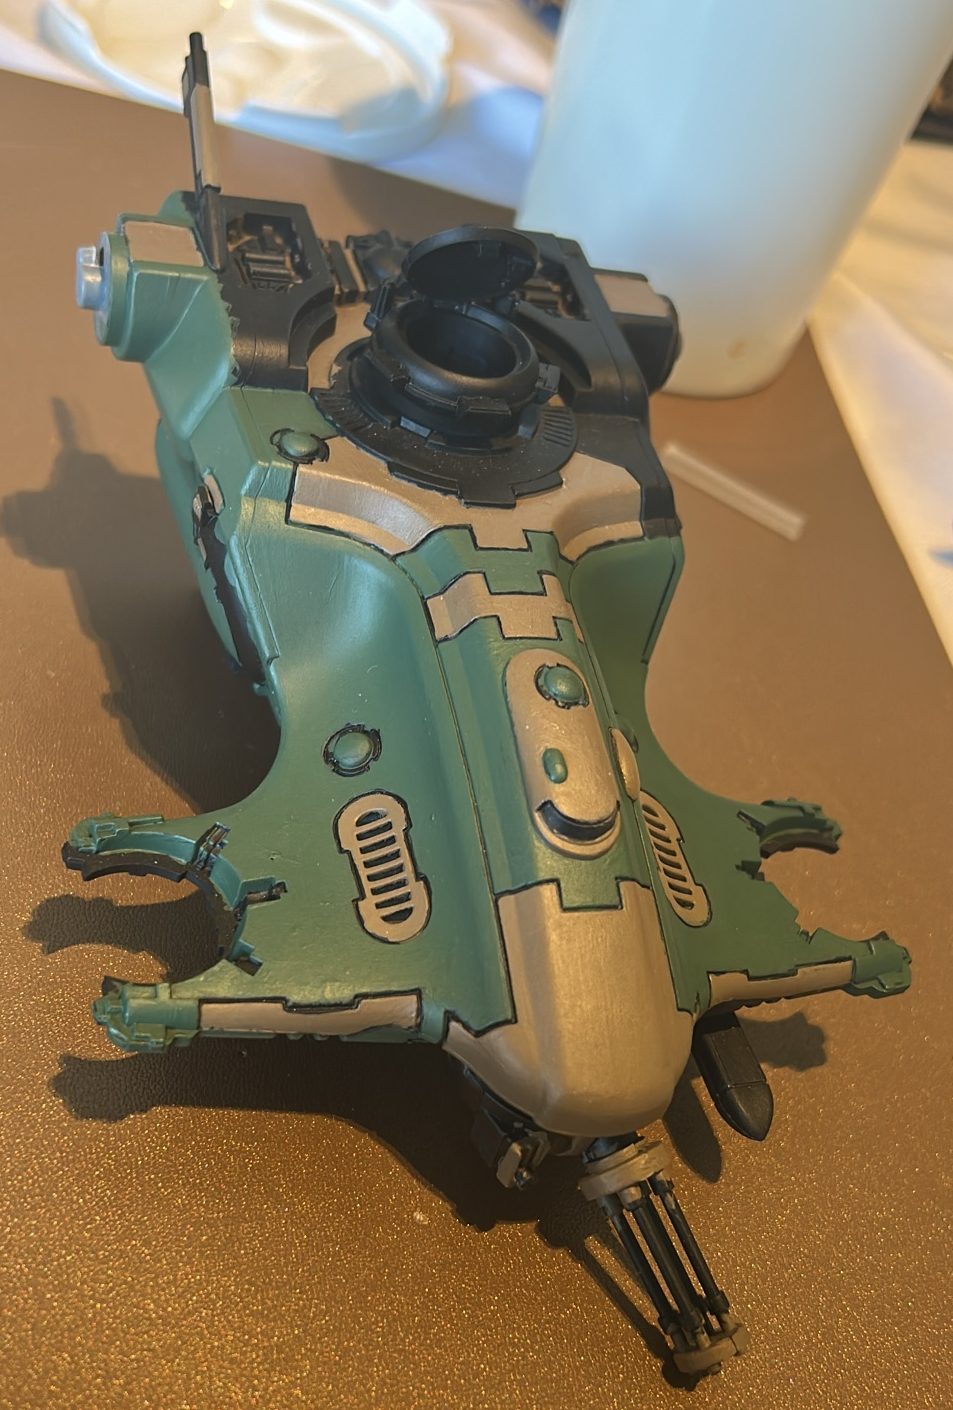
During this process, I made an unfortunate mistake, I broke the lid of the Devilfish. I had initially set it slightly open to show the interior, but I forgot about it while painting the underside, causing it to snap. Lesson learned: always be mindful of delicate parts when handling a model during painting!

Refining the Brown Areas

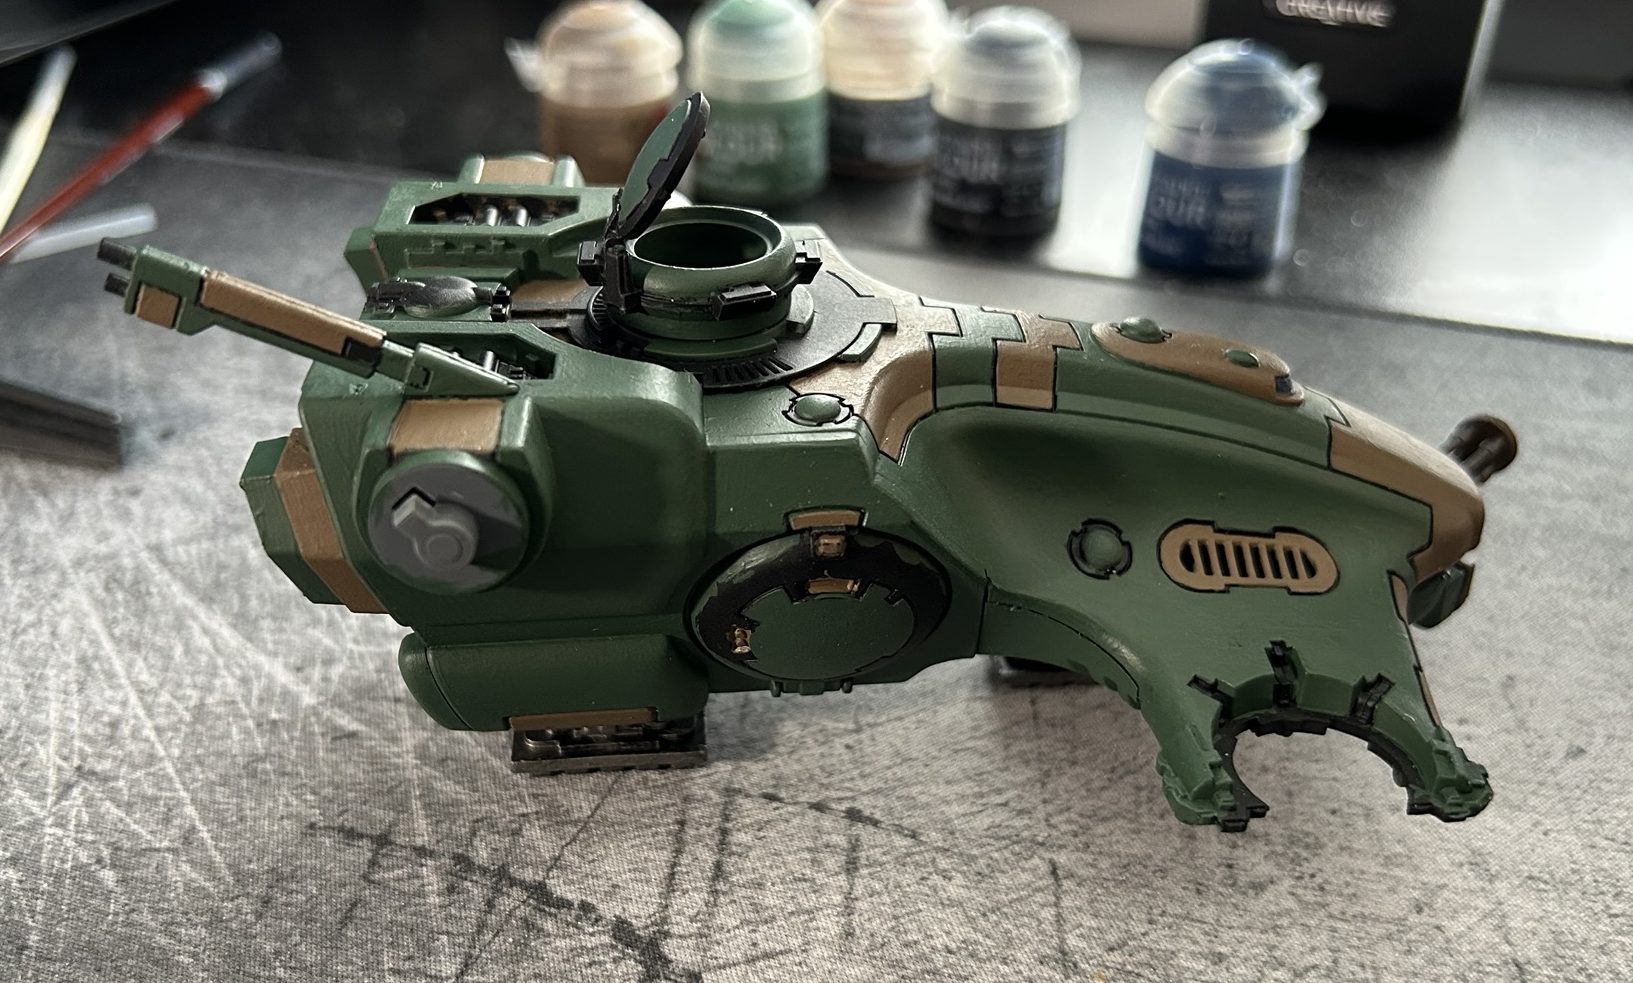
Satisfied with the colour scheme, I moved on to the main body. Starting with the brown, I carefully selected areas to highlight, smaller panels and grills, to make them stand out. This took some time, as I kept refining which sections I wanted to separate from the primary colour. After a while, I was happy with the finished areas. Unfortunately I forgot to take pictures of this after doing this section.

Applying the Main Colour

Next came the biggest task, the primary colour of the Devilfish’s body. Applying the green was far more time-consuming than I had expected. On average, each side took around 2/3 hours, depending on how much of the body was covered in brown sections. This became the most intensive painting project I’ve undertaken for any model so far.

As I progressed, I found myself making small mistakes due to fatigue, especially after extended painting sessions. Typically, I work in one-hour increments, but with the Devilfish, I ended up doing two to three hours in a single sitting. After finishing the green, I decided to hold off on touching up the brown until after applying the silver for the metal details, anticipating further corrections would be needed.

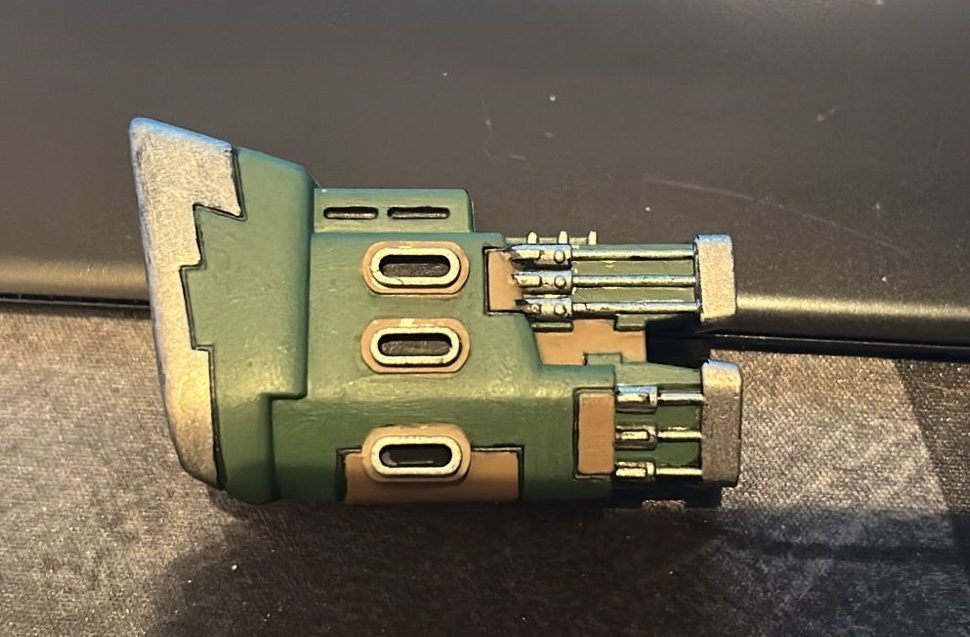
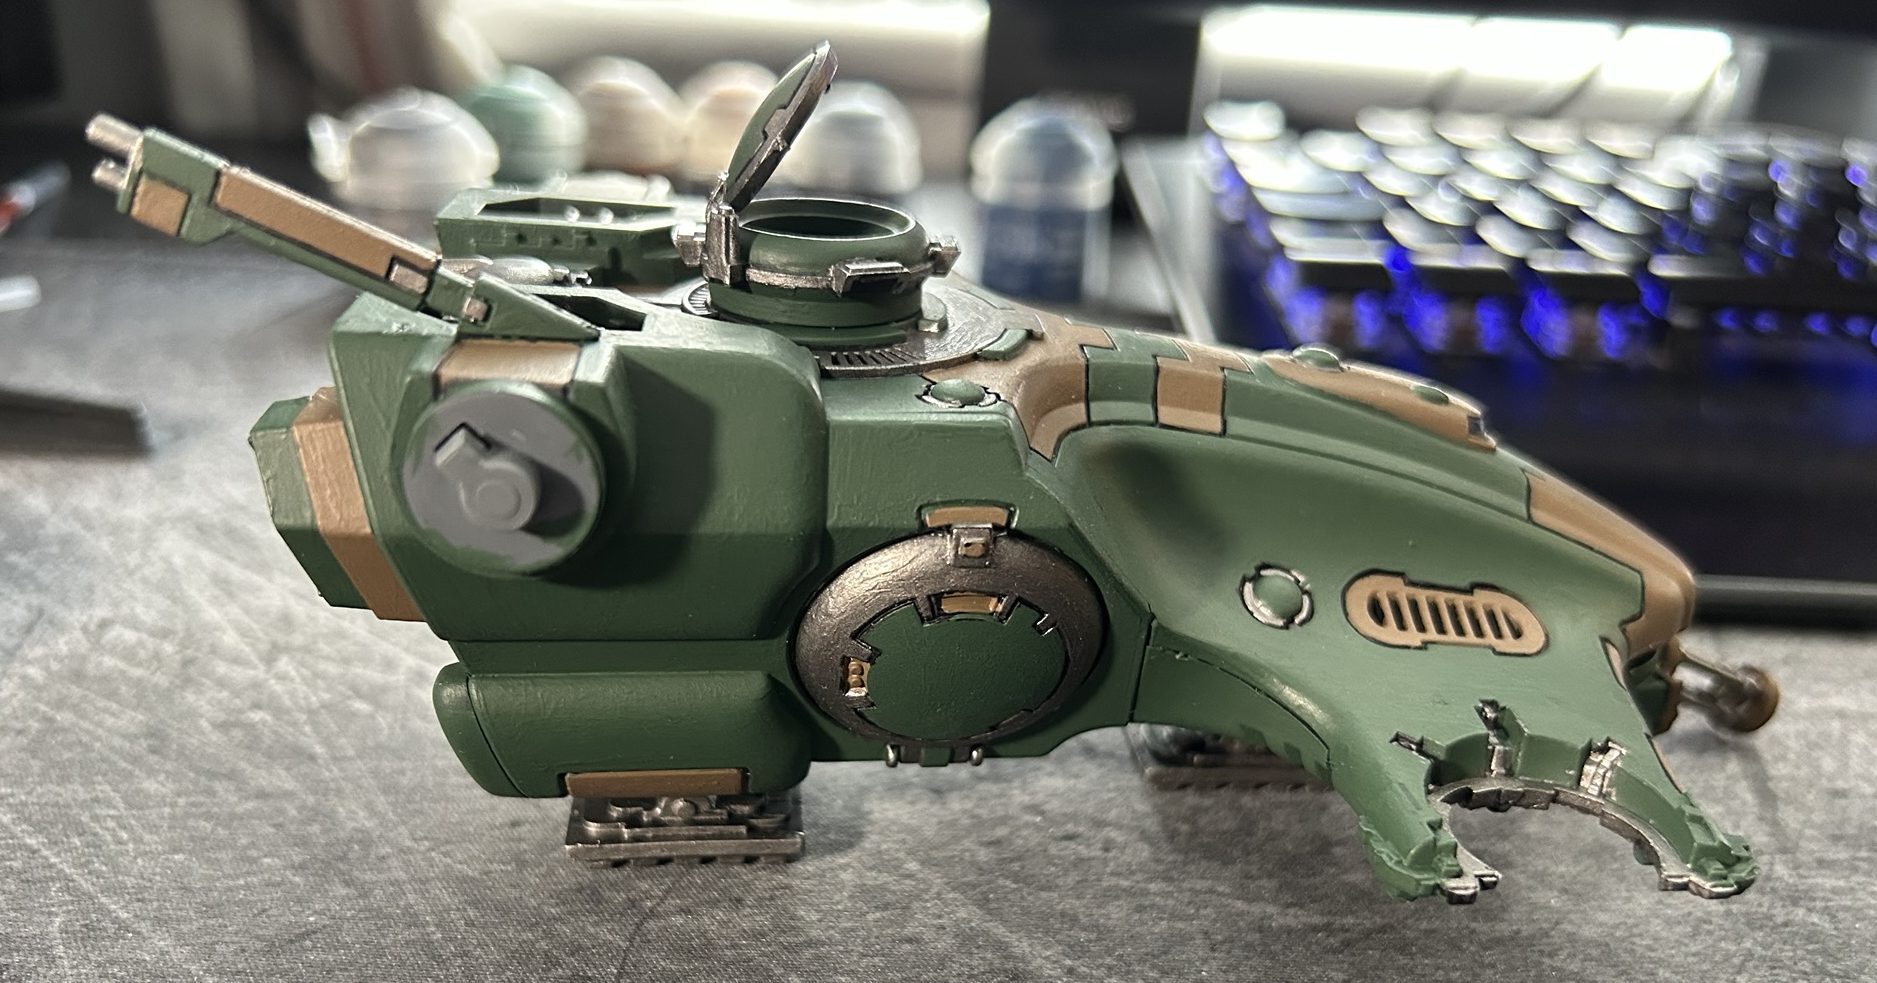
Adding the Silver Details

The silver accents needed careful application, primarily on the doors to distinguish the green and brown sections, as well as on the landing feet, the main gun, around the hatch, and a few smaller details on top of the model. This stage was much quicker compared to the other colours, with fewer mistakes.

Once I was satisfied with the silver areas, I went back and did final touch-ups, which didn’t take long. The model was coming together nicely, leaving only the gun turrets as the last step before completion.

Completing the Gun Turrets

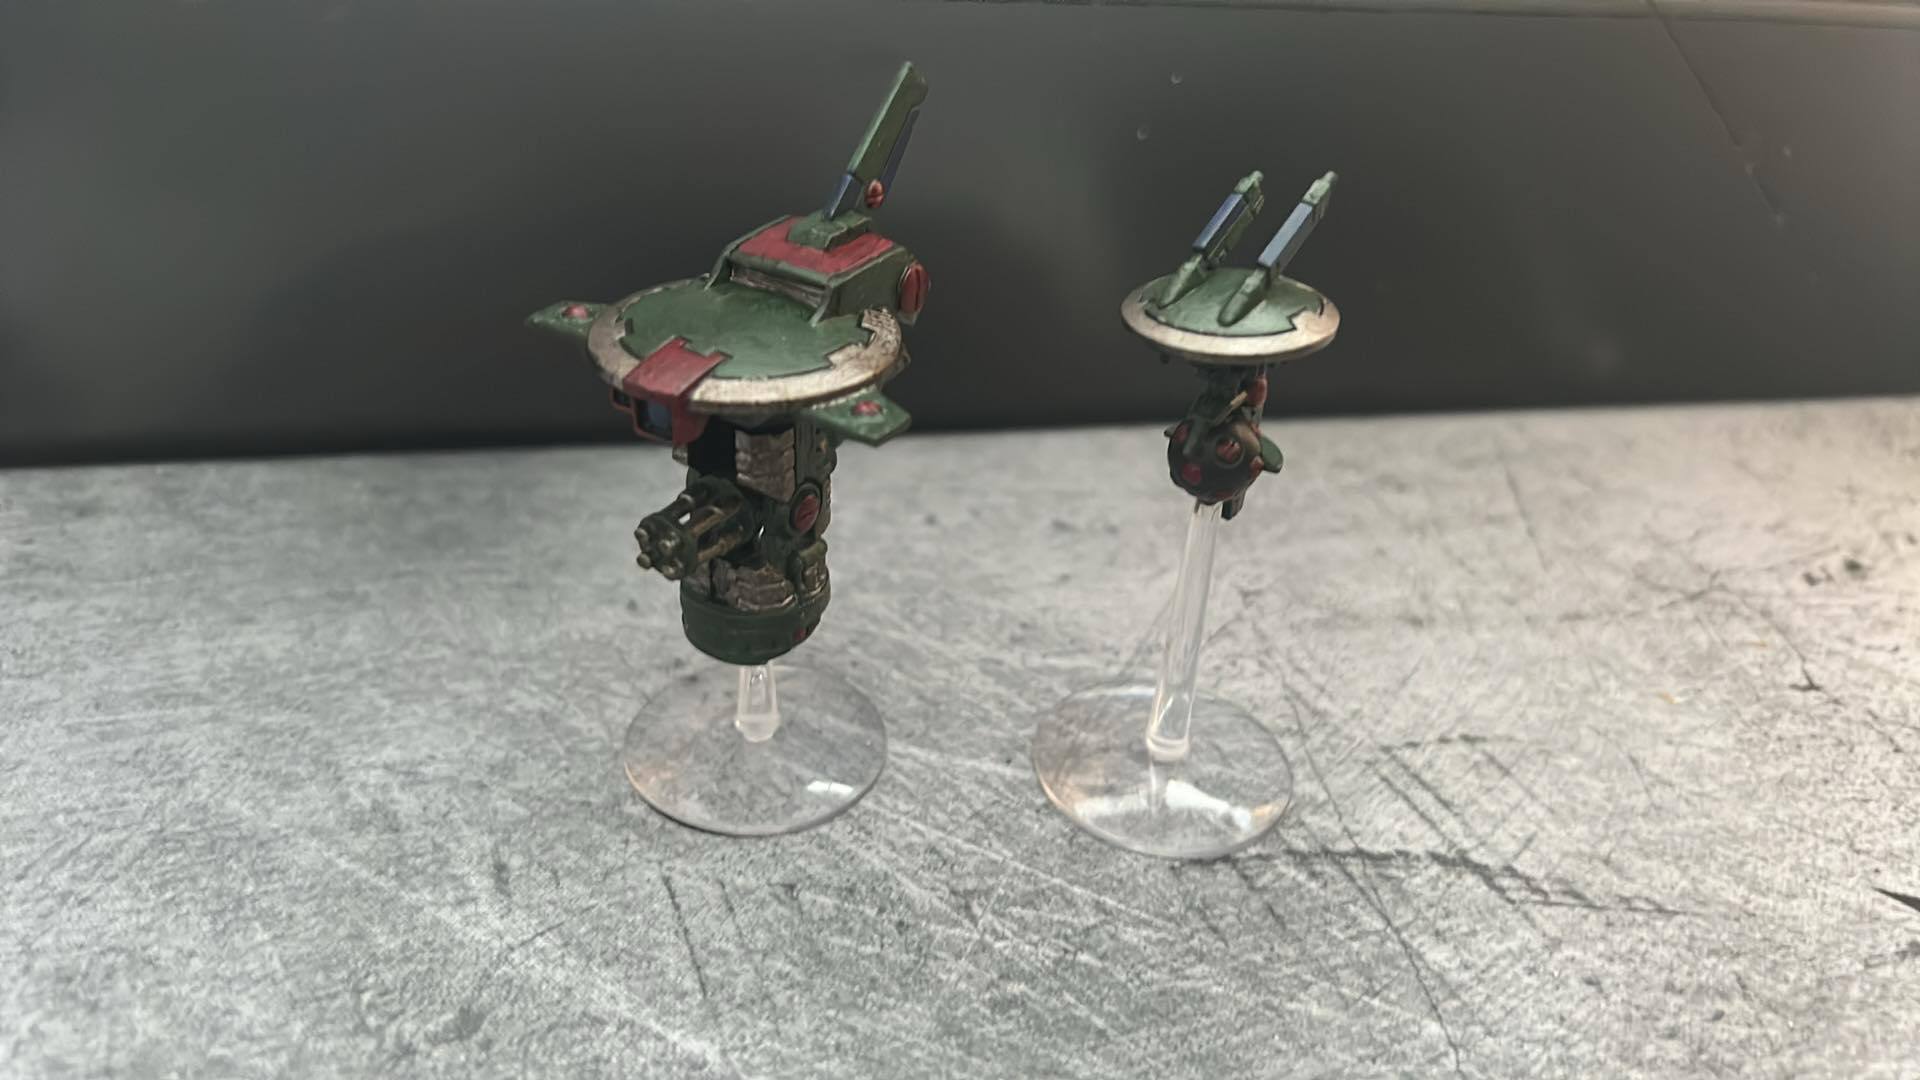
The two remaining gun turrets didn’t take long to paint, following the same colour layout as the infantry drones. Keeping the sections uniform helped maintain a cohesive look across the model. With them finished, I assembled everything and took a moment to step back and look over the final piece. I was happy with the result, it felt like a solid effort for my first vehicle.

Final Thoughts

Painting the Devilfish has been a challenging yet rewarding experience, pushing me to refine my techniques and build patience with larger surfaces. The process of balancing colour choices, handling mistakes, and adjusting my painting sessions has taught me valuable lessons that will carry over to future projects.

While I initially hesitated to apply silver for the finer details, I’m pleased with how it helped define the different sections of the model. Even the touch-ups at the end felt more like a refining process rather than just correcting errors, proof that I’m becoming more confident in my approach.

What’s Next?

With the Devilfish complete, I now have a choice, do I finish painting the commander to complete the combat patrol, Tyranids or shift focus to my Thousand Sons army? There’s also the question of refining some of my techniques, particularly edge highlighting and colour blending, to take my painting skills to the next level.

Regardless of my next steps, this project has reinforced my appreciation for the craft and the continuous learning that comes with it. I look forward to tackling the next challenge, one brushstroke at a time.

Shoutout

If you enjoy my posts or simply appreciate well-painted models, one of my friends, who I regularly play with, has a TikTok dedicated to his miniature painting. Be sure to check him out at Resin Rogue 3D.

Until next time, stay sharp and keep gaming. Panda out.

Comments (2) »

Painting My Second Unit: Pathfinders

Why Pathfinders?

The second unit I decided to paint was my Pathfinders. I’m not sure why, but they’ve always been one of my favorite units in the Combat Patrol. Their strong ranged weapons, combined with a solid medium-range backup, make them incredibly versatile. I also love the rifle design and the drones they deploy, adding an extra layer of tactical depth.

Applying Lessons from My Breachers

Learning from my experience painting my Breachers, I adjusted my approach for the Pathfinders. A great tip I received was to start from the inside out, leaving the armor for last, so that’s exactly what I did. It made the process smoother, though I regret not taking progress pictures this time around.

Choosing the Colour Scheme

For their secondary colour, I chose red. It creates a striking contrast against the green and gives the unit a bold, battle-ready aesthetic. Since Pathfinders have less armor on the lower half, the red was more dominant, but it added a nice balance to the overall scheme.

When painting the legs, I realized the blue I used was too dark, I should have gone with a lighter shade. It’s another lesson learned for future projects, reminding me how even subtle adjustments can make a big difference in the final result.

Painting the Armour

I applied green to the armor, carefully avoiding the underclothes on the upper body. Of course, mistakes happened, and I had to go back and touch up certain areas, but that was expected. Despite that, I feel like I kept things clean, and each challenge was another step in improving my technique.

Adding Details and Contrast

I added some yellow to make the mark light on the rifles more distinct, along with a few other smaller items in hand, helping them stand out.

For the Pathfinders using rail rifles, I went with silver for the main parts of the gun, giving them a futuristic yet slightly rugged feel, almost like a relic of past wars with a modern upgrade.

Washing for a Gritty Effect

As I did with my Breachers, I washed over each model. Again, I didn’t apply a second base coat, allowing the wash to retain its dull, gritty effect on my models. The contrast between the colours feels strong and cohesive, enhancing the unit’s battle-worn aesthetic.

Painting the Drones

I kept the same colour scheme for the drones to match the Pathfinders. In Combat Patrol, you use the Grav-inhibitor drone, which reduces a charge roll by 2, critical for keeping the squad out of melee range, where the T’au’s melee is notoriously weak.

For future expansion, when I reach 1,000 points for my army, I’m considering using the Recon drone instead, which could add another layer of tactical depth to my force.

Final Thoughts

Overall, I feel I did a much better job on these than the Breachers. The progress is clear, and I’m starting to get a better grasp of techniques that help refine the painting process. As with anything, practice is key to improving. I just wish I had more time to both play games and paint models.

I still have many techniques to learn, from dry brushing to highlighting the sharp edges on the model. I’m hoping to try some of these soon, but I’m also a bit worried about messing up a fully painted model. Finding a colour that creates a good contrast is also a challenge, but as I keep experimenting, I know I’ll improve.

Next, I’ll be starting my Devilfish. Painting a larger, blockier model should give me valuable experience before tackling the Commander Suit, one of the most exciting projects on my list.

Also, if you’re really into painting Warhammer models, check out my friend on TikTok, he uploads almost daily, showcasing new painted models from a wide range of projects: Resin Rogue 3D.

Until next time, stay sharp and keep gaming. Panda out.

Comments (1) »

Warhammer Painting: My First Proper Attempt

If you read my first Warhammer post, you’ll remember that my first attempt at painting was a disaster. My 20-year-old dwarfs finally saw the light of day, only for me to realise how badly I messed up. Let’s just say this is what happens when you don’t thin your paints properly.

Those models still sit unfinished, and honestly, I don’t see myself ever painting them.

Choosing My Warhammer 40K Army

When picking an army for my new Warhammer 40K journey, I went through two or three different factions before narrowing it down. In the end, it came down to T’au Empire vs. Necrons.

What ultimately won me over? The clean, straight edges and the overall sleek design of the T’au models.

Since I had no idea where to start, I went for the Combat Patrol, a great entry point that gave me a solid mix of infantry and machines to build upon. It was the perfect first step into painting.

Early Mistakes & Lessons Learned

Since I was new to painting models properly, I made mistakes right away.

My first big error? Fully assembling everything before painting.

This made certain areas almost impossible to reach, and I inevitably ended up accidentally marking already painted sections when trying to get those tight spots. Unfortunately, I only realised this after fully assembling both of my Combat Patrols.

But mistakes are how we learn, right? After assembling my models, I primed them with an undercoat and waited eagerly to begin painting.

Painting My First Squad: Breachers

With everything built, the next big question was: What to paint first?

I decided to hold off on the larger units until I had more confidence with a brush, so I started with my Breachers, a standard infantry squad.

I knew I wanted green as my primary colour. Since I’m still learning the game, I also wanted each squad to have a secondary colour to make them easier to identify on the battlefield. For the Breachers, I picked yellow as their secondary.

First Steps with a Brush

When I started painting, I had no idea where to begin or any techniques to follow, so I just grabbed a brush and started with the largest areas first.

Green being the dominant colour, I applied it to all the armour sections. At least two layers are needed to properly cover the undercoat.

Considering my dexterity is on par with a rock golem, I think I did a solid job keeping things tidy without bleeding colour into areas that needed to stay clean for the next layers.

Adding the Secondary Colour

Applying the second colour wasn’t as bad as I expected. Sure, I had a few mishaps where I accidentally painted over parts that were already finished, but nothing major.

Final Touches: Emblems, Skin & Washes

After finishing the base colours, all that remained were the T’au emblems and skin tones.

These didn’t take long, and I actually made very few mistakes on them.

Once the painting was complete, I decided to apply a wash to the models. Normally, after a wash, you’re supposed to go back over the armour with the main colours again to restore the brightness.

However, I really liked the dull, gritty effect the wash gave my models, it made them feel like battle-hardened soldiers, so I kept them that way instead of repainting.

Squad Complete & Drones Painted

With my first squad done, I painted their accompanying drones, keeping the same colours to match their respective units.

This turned out to be a great way of keeping track of my teams, rather than spending time sorting through units during every game. Being able to quickly recognise squads on the battlefield makes matches smoother and helps me think of strategies mid-combat.

Final Thoughts & Painting Takeaways

For my first serious attempt at painting models, I’m really happy with the result.

The colours are clean, the details aren’t drowned out, and most importantly, I enjoyed the process. If you don’t enjoy painting your models, you’re likely to end up with unfinished miniatures collecting dust, just like my dwarfs from 20 years ago!

Share Your Tips!

If you have any advice, tips, or tricks for painting models, I’d love to hear them! I’ve still got plenty more to paint, so any help is appreciated.

Also, if you’re really into painting Warhammer models, check out my friend on TikTok, he uploads almost daily, showcasing new painted models from a wide range of projects: Resin Rogue 3D.

That’s all for now, Panda out.

Leave a comment »

Back to Warhammer After 20 Years

A long time ago, when I had no responsibilities or major financial commitments, I jumped into Fantasy Warhammer. I went all out, spending far more than a new player should, getting a full army of dwarfs, all the necessary books, paints, etc.

Despite my enthusiasm, my group only played a handful of times. I undercoated most of my units but never painted them, mainly because I was terrible at it. Eventually, they ended up in a box, where they’ve remained for the past 20 years.

Now, I’m back, this time in the 40K scene. But unlike before, I didn’t throw all my eggs in one basket… I threw in two instead. I walked away with two Combat Patrols: T’au Empire (which will be my main army moving forward) and Tyranids. Between myself and a few friends, we have six different armies to play against each other, keeping things fresh. The end goal? A fully assembled 1,000-point army to go to war with.

The Painting Journey Begins

This section of my blog is dedicated to my first proper attempt at painting, and I want to share my progress with you all.

I’m not the fastest painter, life is busy, and between other hobbies, it takes me a while to complete units. But I’m happy to say that I’ve finished two full squads already, which I’ll showcase in other posts. Right now, I’m focused on improving my technique, making sure my models don’t just look like a mass blob of paint.

Previously, I never knew you had to thin down Games Workshop paints, and this small discovery has made a massive difference in preserving details. I still have a long way to go before finishing my first batch, but I’m struggling to resist buying more models before completing what I have!

Playing the Game

We’ve played several matches already, though the Combat Patrol rules are a watered-down version of the full game. That means we still have plenty to learn before engaging in large-scale battles.

That said, I’m enjoying Warhammer 40K far more than expected. Painting has turned into something I genuinely look forward to, and gaming with friends is always a blast. I can’t wait to showcase a fully painted army.

Lessons Learned

My colour scheme doesn’t follow any official rules, making it uniquely mine. However, I’d love to hear feedback on how to improve my painting skills.

One common mistake that many beginners make, and one I made myself, was gluing all the models together before painting. This made reaching some areas incredibly difficult. If you’re just starting out, learn from my mistakes:

  • Assemble your models in parts.
  • Use Blu Tack to temporarily attach sections.
  • Protect joining areas so the final assembly is seamless.

Final Thoughts

A friend of mine has been painting for years, and I’ve been picking up tips and tricks from him along the way. You can check out his work on TikTok, he uploads almost daily, showcasing painted models from a wide range of projects:
Resin Rogue 3D.

If Warhammer interests you, stay tuned for more as I document my journey.

Panda out.

Leave a comment »